

Automate your releases on GitHub.

Pradumna is a Developer Advocate, Docker Captain, and a DevOps and Go Developer. He is passionate about Open Source and has mentored hundreds of people to break into the ecosystem. He also creates content on X (formerly Twitter) and LinkedIn, educating others about Open Source and DevOps tools. Pradumna enjoys engaging with people in person and delivering talks.
So, what are releases?
Packaging/bundling software and making it available for a broader audience for download and use.
Why use them?
To distribute the software (Binary distribution).
To keep track of type and amount of changes.
To follow Semantic versioning practices.
To go back in time and use the previous version.
It looks professional.
Why automate releases?
Creating a release manually can be a little tricky and challenging at the same time. Using a GitHub workflow with a few lines of the YAML, we can automate that task and focus more on development. Alongside, it also generates a changelog file (CHANGELOG.md) and tags.
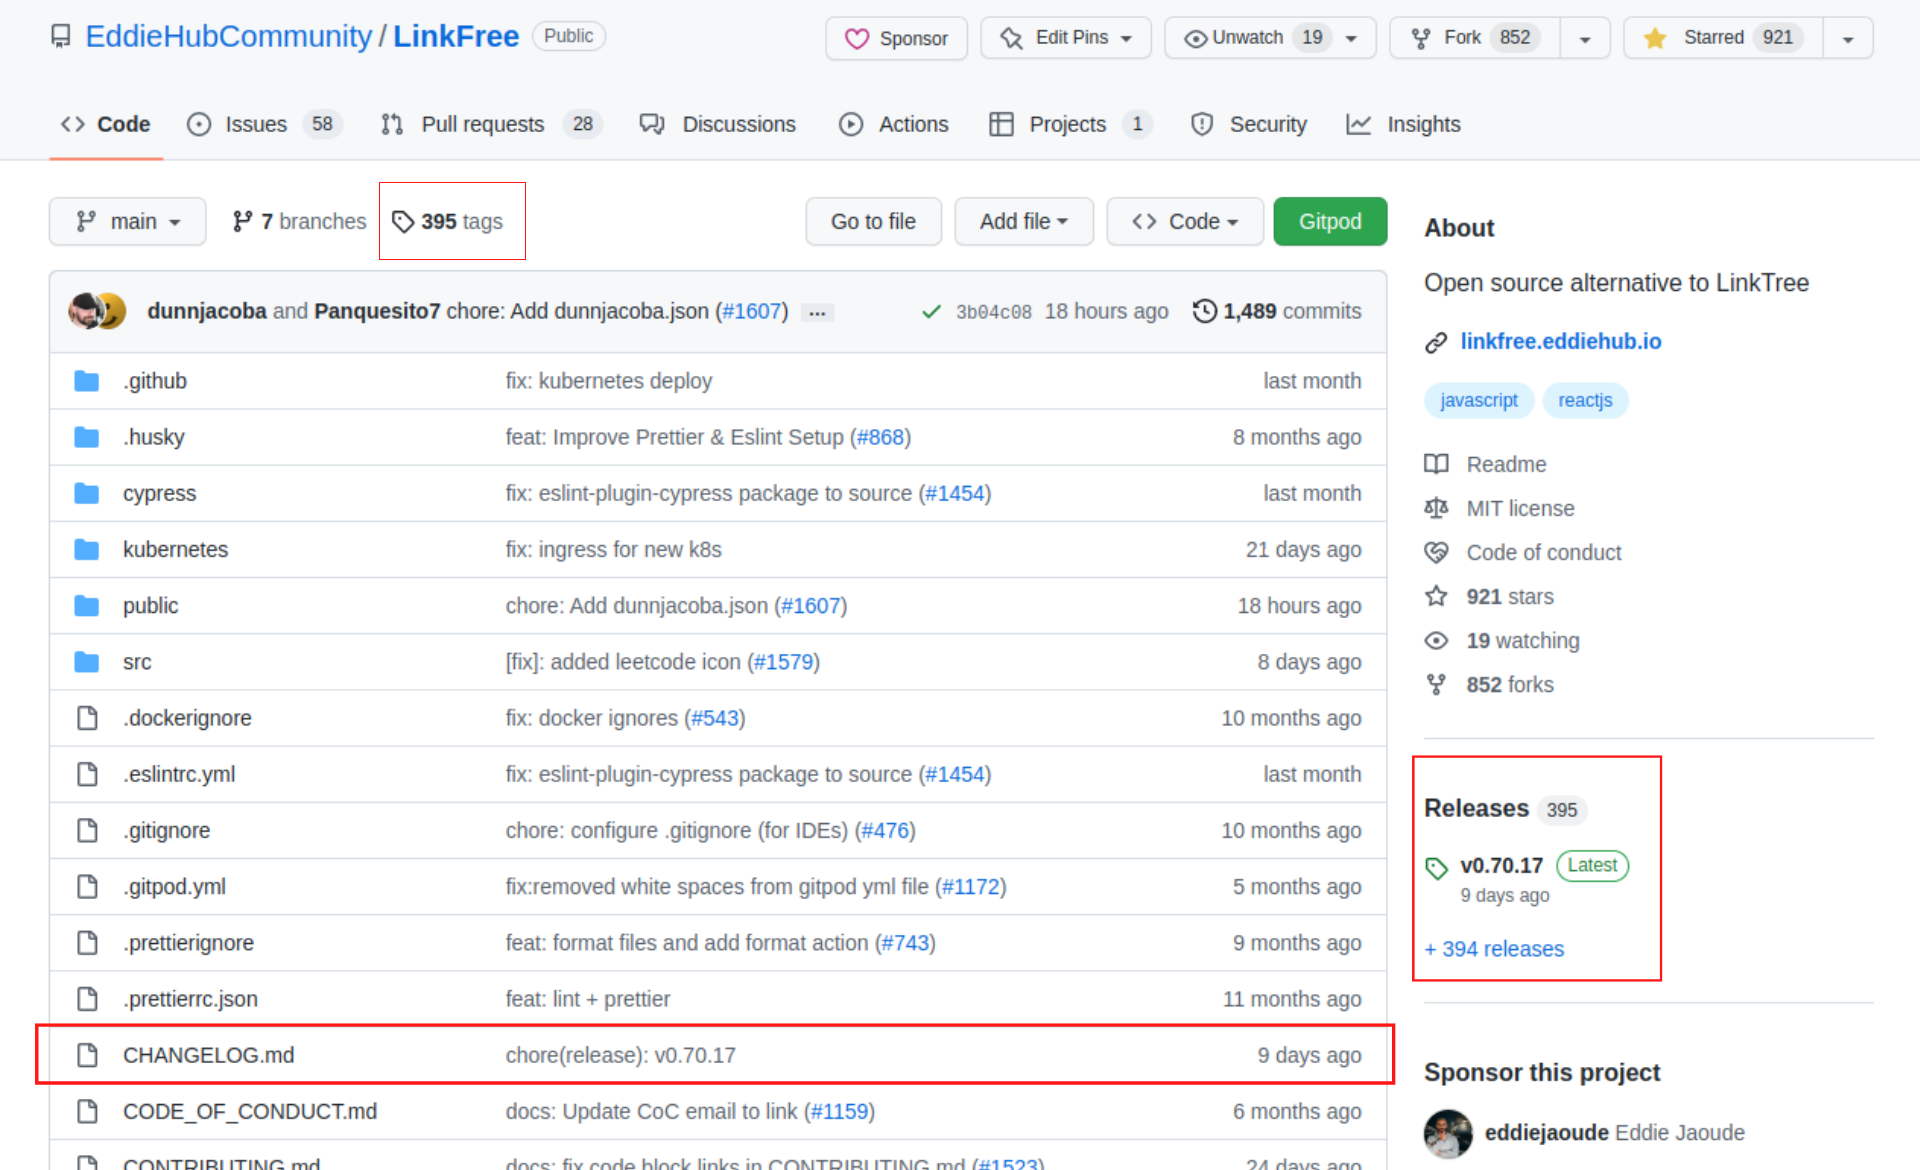
Picture - EddieHubCommunity/LinkFree repo.
Using the workflow.
Create a .github folder inside the root of the repo. Create a folder name workflows inside the .github folder. Then create a releases.yml file by adding the YAML config provided below inside the workflows folder.
- Complete path will be
.github/workflows/releases.yml
YAML Config:
name: Releases
on:
  push:
    branches:
      - main

jobs:
  changelog:
    runs-on: ubuntu-latest

    steps:
      - uses: actions/checkout@v3
      - name: conventional Changelog Action
        id: changelog
        uses: TriPSs/conventional-changelog-action@v3
        with:
          github-token: ${{ secrets.github_token }}

      - name: create release
        uses: actions/create-release@v1
        if: ${{ steps.changelog.outputs.skipped == 'false' }}
        env:
          GITHUB_TOKEN: ${{ secrets.github_token }}
        with:
          tag_name: ${{ steps.changelog.outputs.tag }}
          release_name: ${{ steps.changelog.outputs.tag }}
          body: ${{ steps.changelog.outputs.clean_changelog }}
Understanding the config
- To automatically trigger a workflow on some events, we use the
on:property. In this case, action will get triggered when the changes are pushed to themainbranch. We can also modify the branch according to our preferences
on:
  push:
    branches:
      - main
- We will be running the workflow on Ubuntu OS. We can also change that
jobs:
  changelog:
    runs-on: ubuntu-latest
- Here we are using two Actions. The
checkoutaction will be used to checkout and go inside the repo, and theconventional-changelog-actionwill look for conventional commits. It will also create a changelog file.
By default, GitHub provides a default token github_token. We can also use a Personal access token.
    steps:
      - uses: actions/checkout@v2
      - name: conventional Changelog Action
        id: changelog
        uses: TriPSs/conventional-changelog-action@v3
        with:
          github-token: ${{ secrets.github_token }}
- Here, we are using the
create-releaseaction, which will create an auto release for us depending on the convention of the commit used
It will auto-set the body and the release commit naming.
      - name: create release
        uses: actions/create-release@v1
        if: ${{ steps.changelog.outputs.skipped == 'false' }}
        env:
          GITHUB_TOKEN: ${{ secrets.github_token }}
        with:
          tag_name: ${{ steps.changelog.outputs.tag }}
          release_name: ${{ steps.changelog.outputs.tag }}
          body: ${{ steps.changelog.outputs.clean_changelog }}
Working
To make the workflow create the automated releases. We need to follow some commit conventions - Conventional Commits. Depending upon the convention used, it will version the new release.
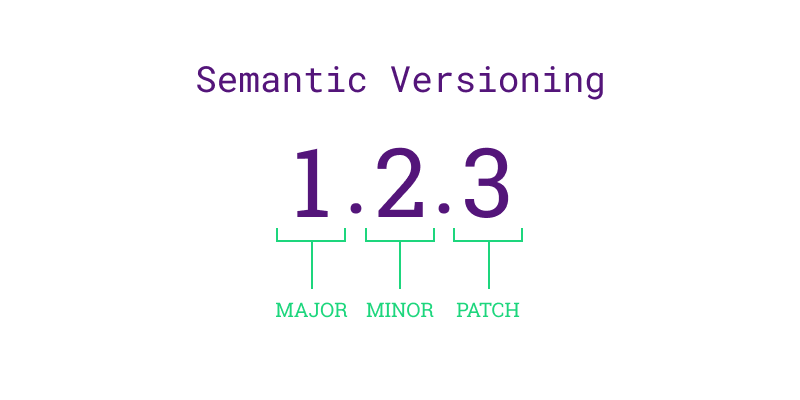
fix:Will bump the last digit - patch.feat- Will bump the middle digit - minorBREAKING CHANGE:- It will bump the first digit by - major
I have also written a blog on Conventional Commits. You can check out that - Getting started with Conventional Commits
We are now all set. Now, when we create a commit with the proper convention, it will do all the magic for us.
That's the end of the blog. Thank you for reading it.


